BeanCounter Manual
BeanCounter supports an unlimited number of businesses. Each business is saved as a separate document and contains any transaction photos, voice memos, and other file attachments. When a new business is created, the business type (sole-proprietorship, partnership, or corporation) and home currency must be specified. These cannot be changed after the business has been created.

Business accounting periods of varying length are supported. BeanCounter can automatically create each accounting period (based on the previous period length) or these may be manually created. Each accounting period may be closed when no further transaction changes should be made. If a nominal transfer account is specified, all nominal account balances (income/expense accounts) are transferred to the nominal transfer account at the end of the accounting period.

Account types include assets, liabilities, income, expenses, and equities. Each account displays a list of its transactions. Accounts may represent an account at an institution such as a bank or credit card account. When a new account is created, the account type and currency must be specified. These cannot be changed after the account has been created.

Filters display a dynamic list of transactions based on their criteria. Any combination of transaction fields may be used for the filter.

BeanCounter supports double-entry accounting which requires all transactions balance their debit and credit totals. Each transaction total is always saved in the home currency along with other currency totals, if applicable. Each transaction contains at least two accounts. Transactions may be split with two or more accounts. Transactions contained in a closed accounting period are locked and are not editable. Each transaction may contain attachments such as photos, voice memos, and other files. A transaction may be set up to repeat (or reoccur). Custom transaction fields may be added to track other information with each transaction.

Clients include a list of projects and estimates. Each project/estimate includes a list of tasks (and task items), expenses, and invoices (with related transactions). Tasks represent project work while expenses represent purchases. A task may be timed or non-timed. A timed task includes a list of task items. A task item represents one contiguous time period. This time period may be set manually or added using the time tracker. The time tracker can be accessed from either the BeanCounter app or the BeanCounter menulet (when the app is running in the background). Non-timed tasks specify a flat rate or the number of hours, days, weeks, months, quarters, or years in the quantity field. Each invoice includes a specific set of tasks and expenses (including time and quantity). When a new invoice is created, a related transaction is also created. This transaction is tied to the invoice and any balance is debited to an accounts receivable account. Any invoice payments must be added in the invoice transactions view. A customized invoice (or estimate) may be generated and emailed, printed, or saved.

Merchants include a list of bills and their related transactions. When a new bill is created, a related transaction is also created. The bill total is entered in this transaction. The transaction balance is credited to an accounts payable account. Bill payments must be added to the bill transactions view.

Reports provide detailed information on the state of your business. Ten types of reports are available including balance sheet, income, cash flow, equity, trial balance, custom currency fields, clients, clients (uninvoiced), merchants, and time. Each report contains settings for specifying the time period, an optional comparison period, and a setting to show or hide related report graphs. Reports may be emailed, printed, or saved.

Business
Business Info

The business info window displays settings for the business. It is displayed when creating or editing a business.

The Business tab includes fields for the business name, identifier, logo, start date, rates, and notes. If creating a new business, select the business type and currency. These may not be changed once the business has been created. Select Create Default Accounts to add the default set of accounts when the business is created.

The Contact tab includes fields for the business phone, fax, email, website, and address. If populated, these fields may be used when generating invoices.

The Accounting tab allows you to set up and manage accounting periods for your business and specify how to handle nominal account balances. Accounting periods may be manually set up (of varying length) or they can be automatically created. If they are automatically created, BeanCounter uses the previous accounting period length to determine the next accounting period. Each accounting period may be closed by checking the closed column. Closing an accounting period prevents any edits to transactions during that period. Note that an accounting period may always be opened again by unchecking the closed checkbox. Accounting period dates must not overlap each other. If a Nominal Transfer Account is specified, all nominal account balances (income/expense accounts) are transferred to the nominal transfer account at the end of the accounting period. This will create a closing transaction at the end of the accounting period for each nominal account that has a balance for that accounting period. Any changes made during an accounting period will cause the closing transactions to be updated. Note that the closing transactions are locked and may not be edited. If None is selected for the nominal transfer account, the closing transactions are not created. In this case, a custom name may be entered in the Retained Earnings Name field. This field specifies the name to use for the calculated retained earnings item (or owner's equity) when creating reports.

The Invoices tab specifies defaults used when generating invoices. These include fields for the tax rate and name, header, footer, and terms. Note that these values may be overriden for each invoice.

Main Window

The main business window shows a list of accounts, filters, clients, merchants, reports, and manage items on the left side. Most of the items also display a total. The list may be sorted by name or manually by dragging items. Under the list is a summary view which displays the current business financial totals. The summary may be hidden by collapsing the view (drag the separator bar down). To the right of the list is the detail window. This displays the account or filter transactions, client projects and estimates, merchant bills, reports, and manage items.

Groups

Groups may be created for accounts, filters, clients, merchants, and reports. Drag and drop items into groups. Selecting a group displays content from all items it contains. Use the group inspector to change the group name or select a tint colour.

Accounts
Account Info

The account info window is displayed when creating a new account or editing an existing account. The account type and currency must be set when creating a new account (this cannot be changed after the account has been created). Enter an account name, number, select an icon, and add notes. If the account represents an institution account (such as a bank account or credit card), select the Institution checkbox and add the details.

Transactions

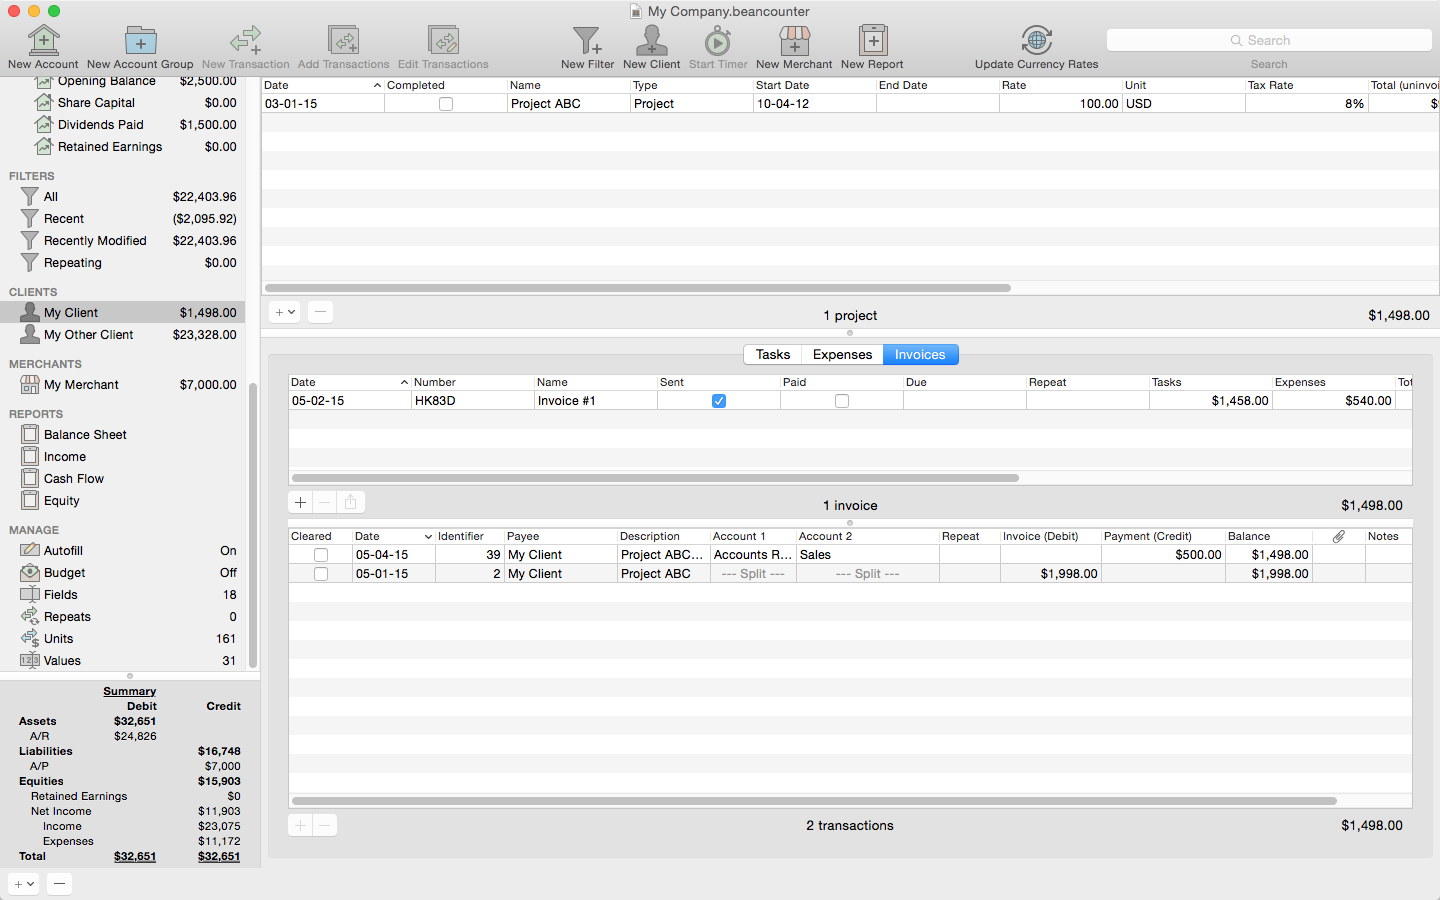
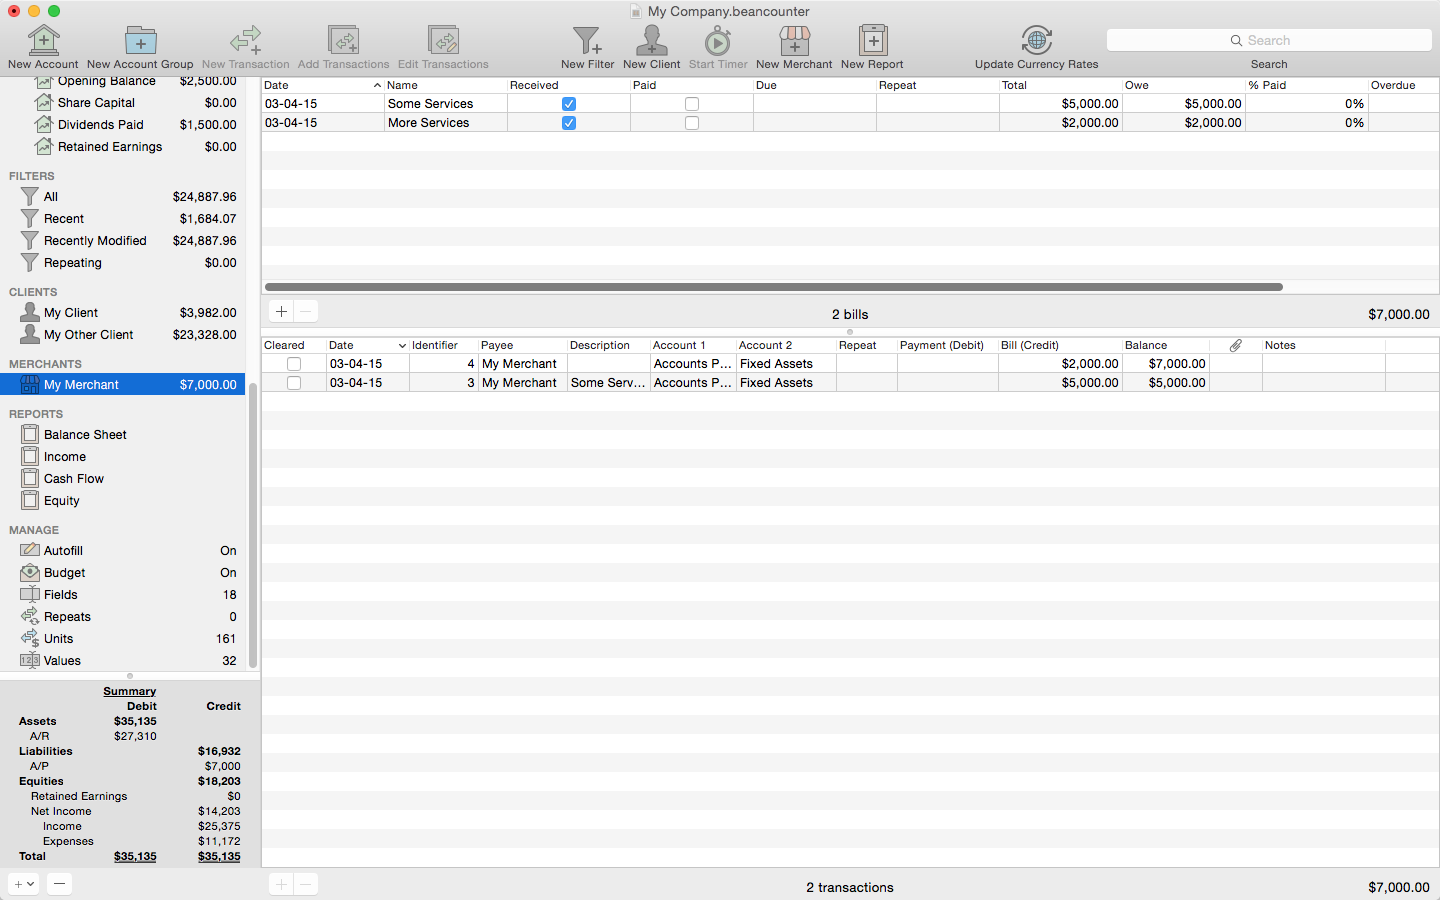
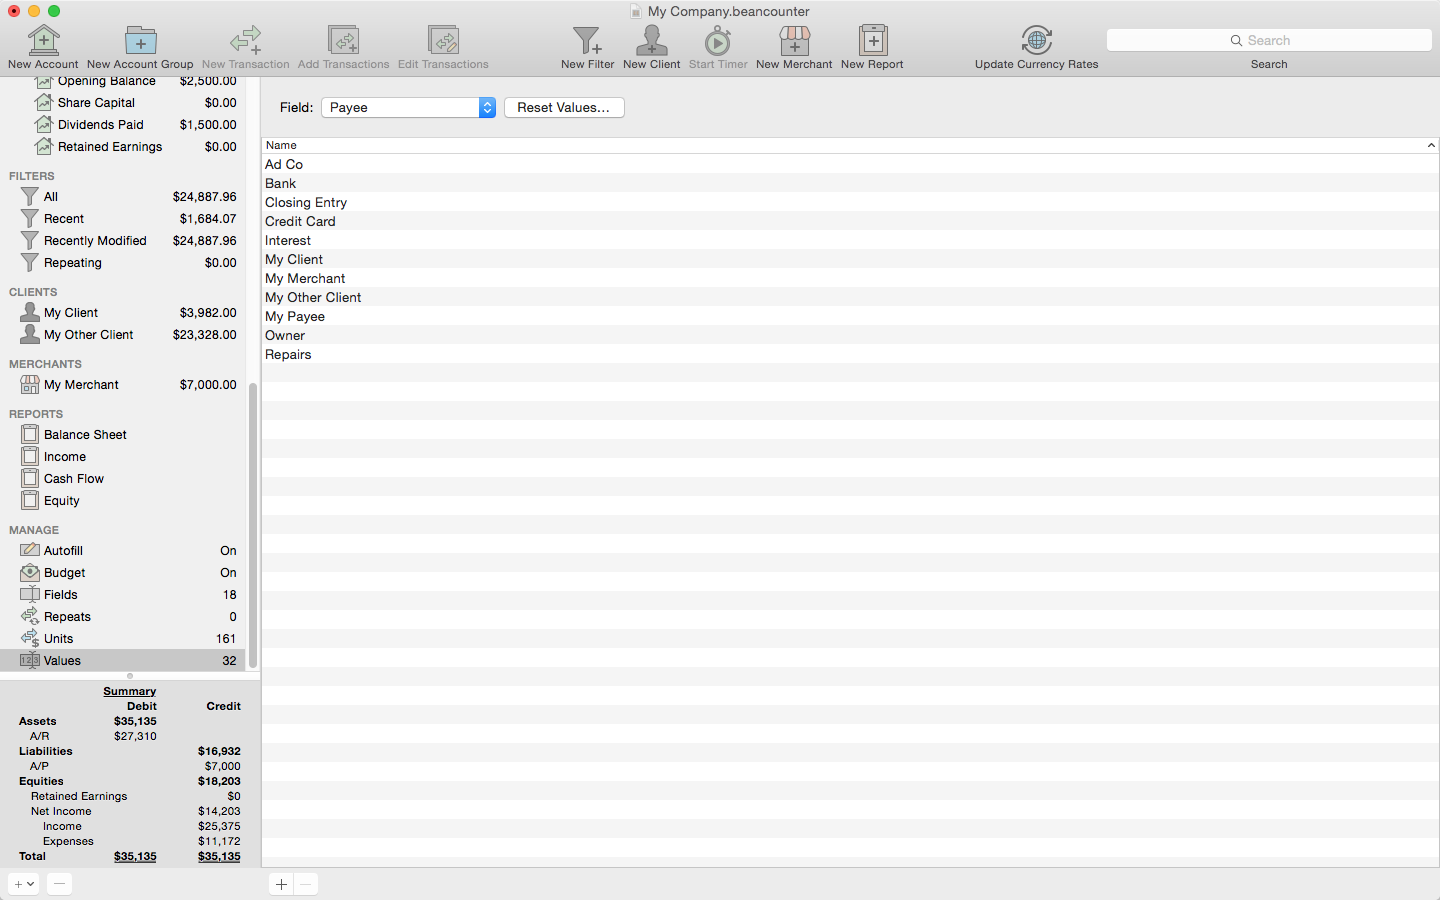
Select an account to display a list of transactions it contains. To filter the transactions by their date, select a date range from the bottom bar. Select one or more transactions to display their total on the bottom bar. If a transaction contains attachment files, a paperclip icon is displayed under the Attachments column. Click the paperclip to show a preview of its attachments. If the transaction is part of a repeat, a small arrow appears under the repeat column. Click the arrow to display related repeating transactions.

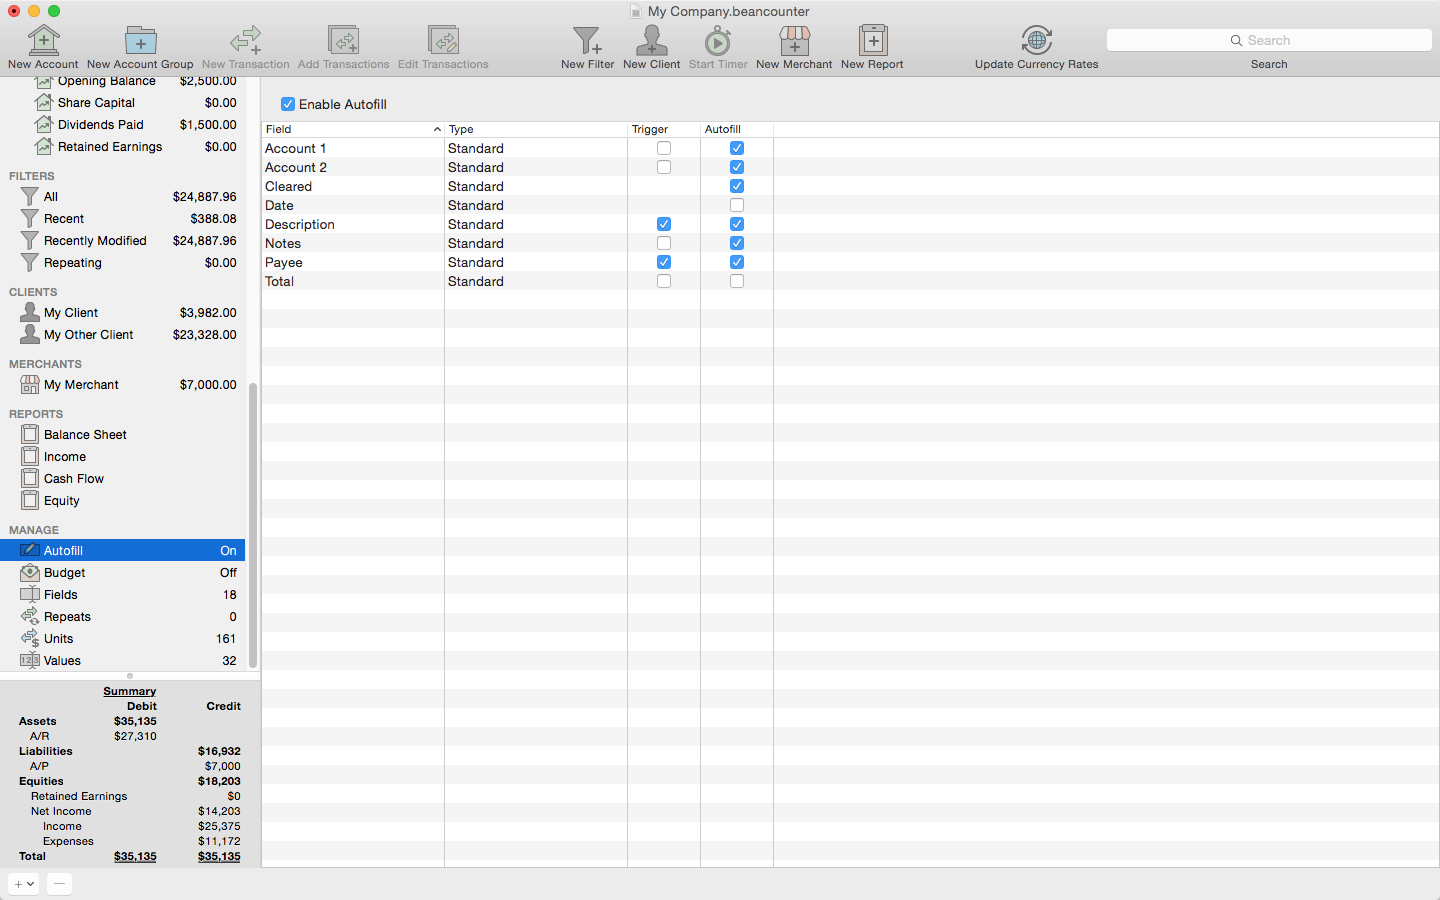
Each account's transactions view may be configured to display only certain fields (under the View menu). The fields may also be rearranged by dragging the field header to a new location.

Transaction

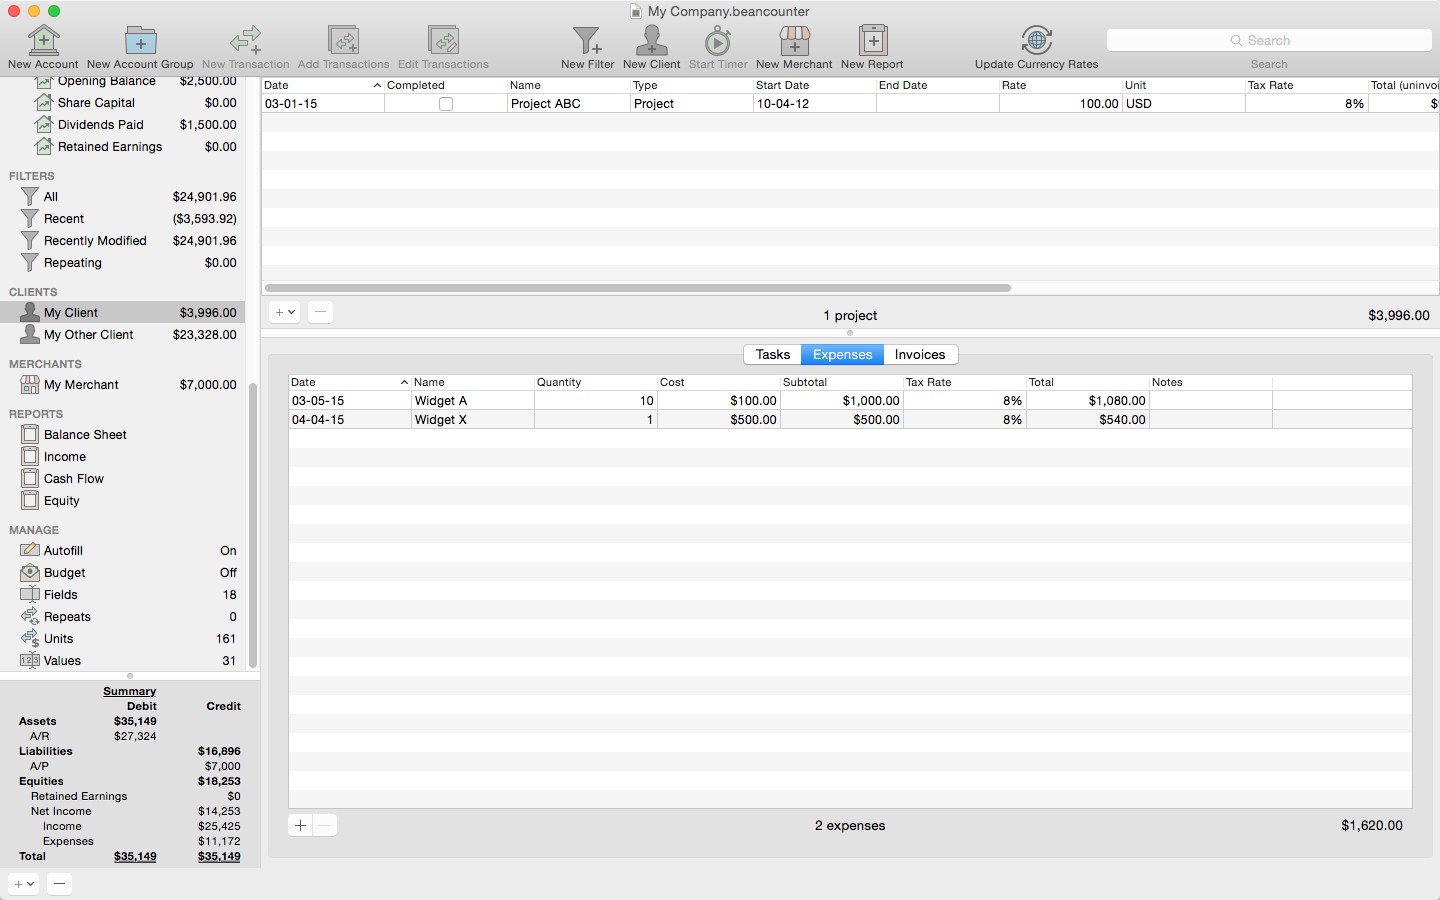
A transaction references at least two different accounts but may reference more if it is a split transaction. BeanCounter implements double-entry accounting which requires each debit to an account match a credit to another account. If a debit total is added to account 1, this results in an equal credit total added to account 2.

Add a new transaction by clicking the + button on the bottom bar. To enter multiple transactions, select Add Multiple Transactions from the Transaction menu. To edit a transaction, double-click or select it and press the space bar or return key. To make changes to multiple transactions, select Edit Multiple Transactions. Note that closed transactions (transactions during a closed accounting period) and locked transactions (created when closing a nominal account) may not be edited. To print a list of transactions, select an account (or group of accounts) and select Print.

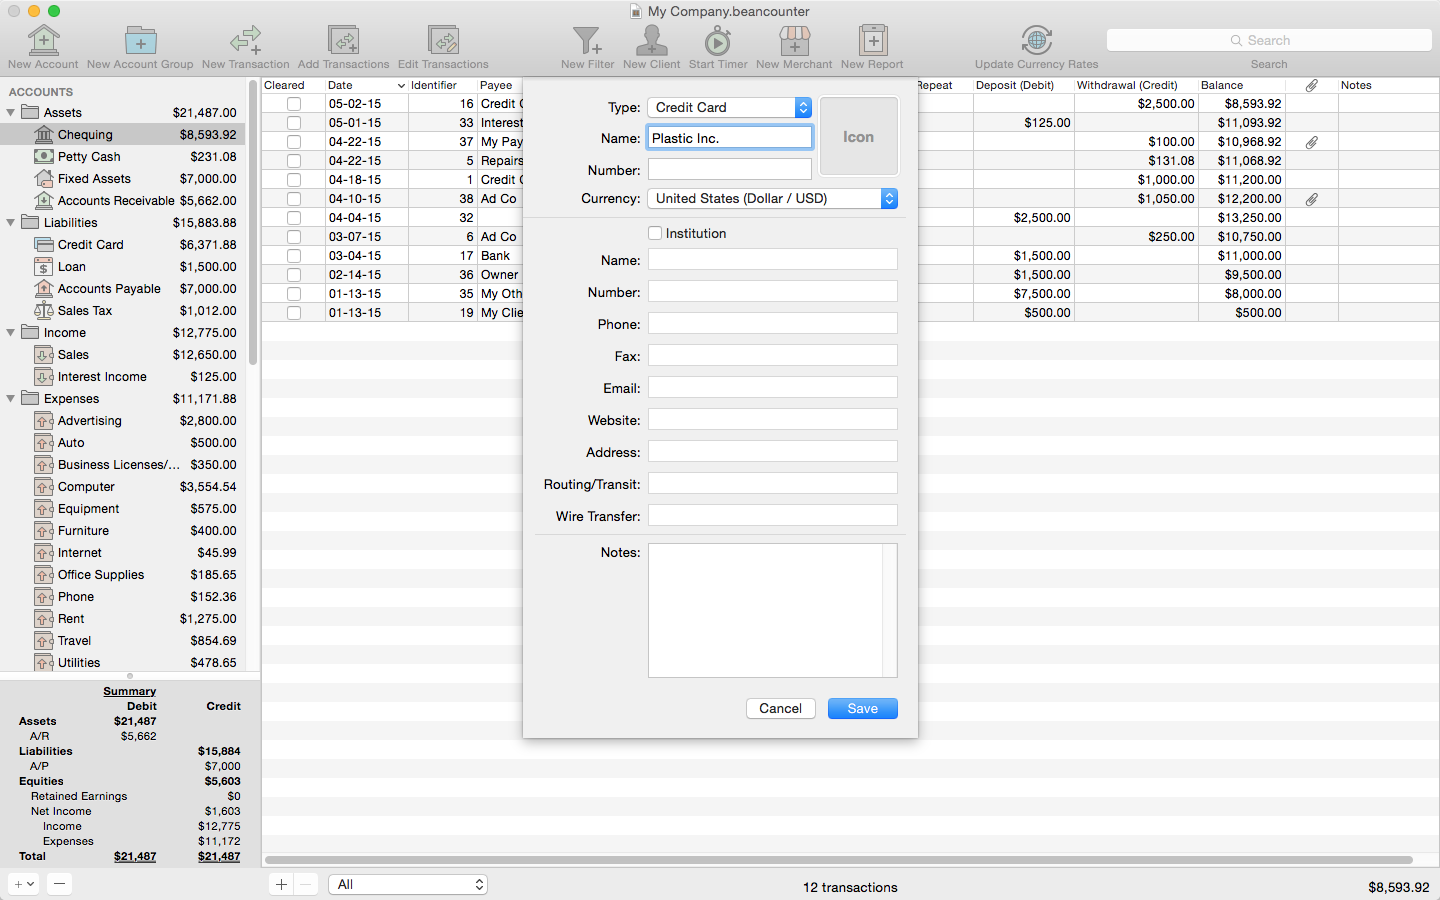
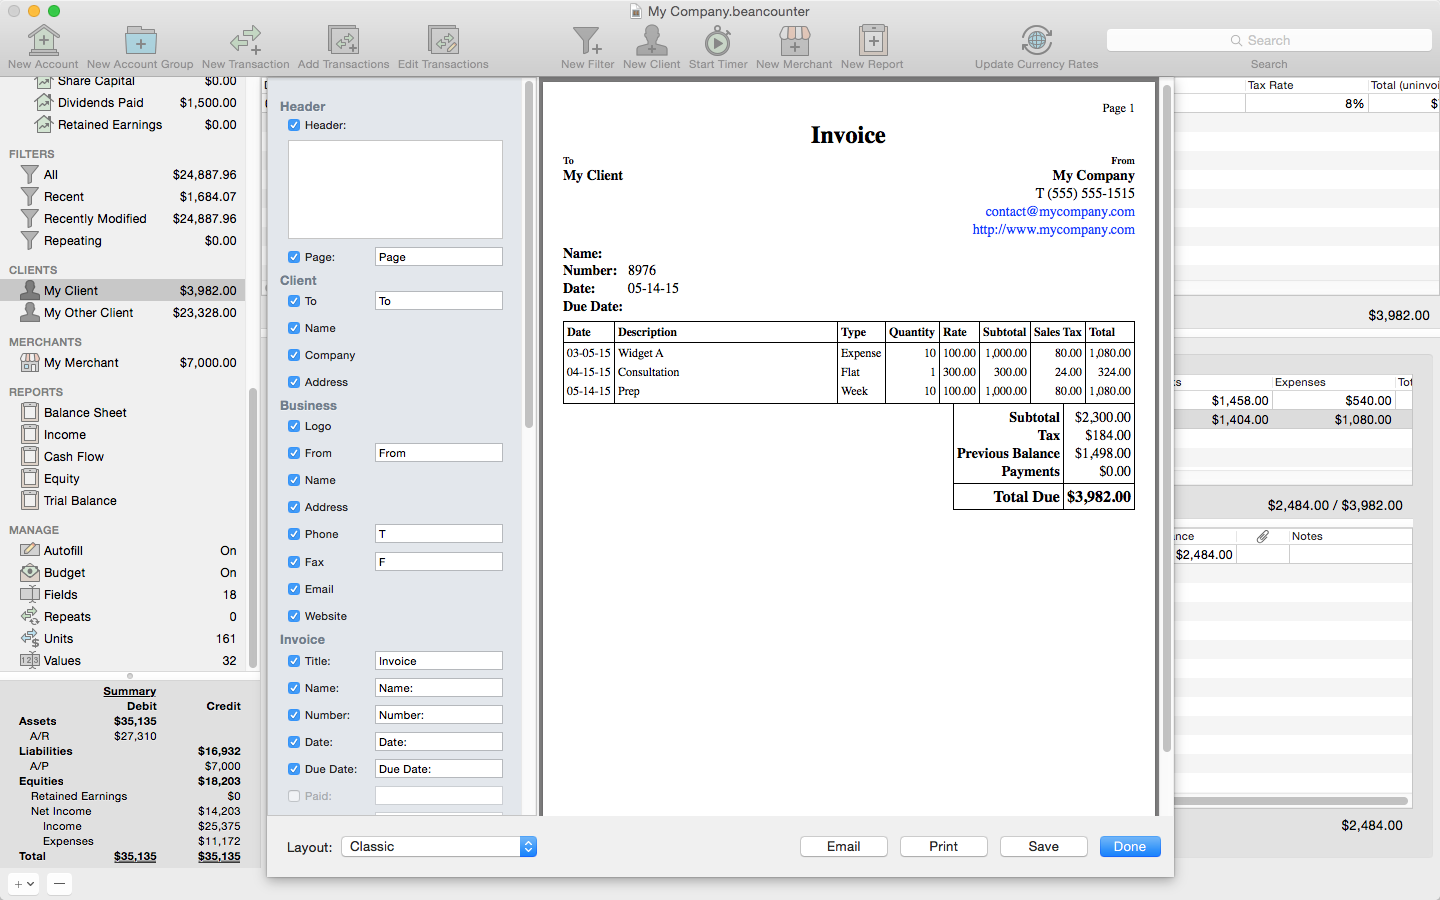
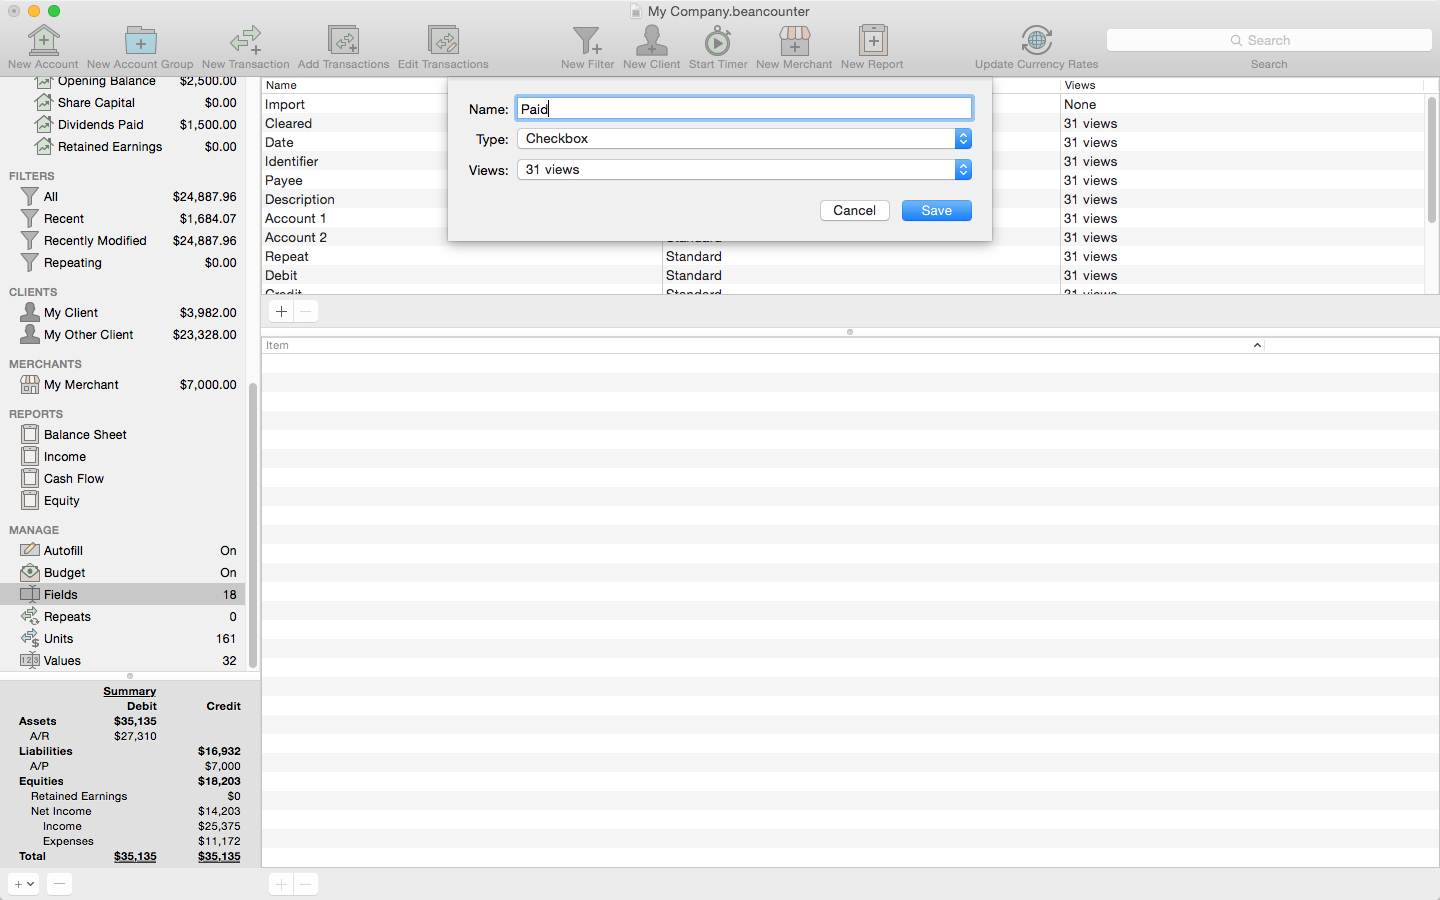
Each transaction contains standard fields for cleared, date, identifier, payee, description, account 1, account 2, repeat, debit, credit, unit (currency/mileage), attachments, and notes. The transaction creation and modified dates are also tracked. Additional custom fields may also be added. The 
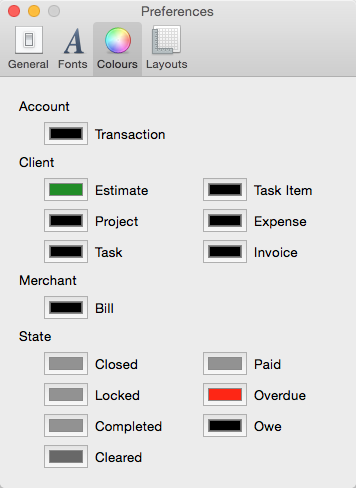
Cleared field can be used to keep track of which transactions have been reconciled with bank/credit card statements, for example. The 
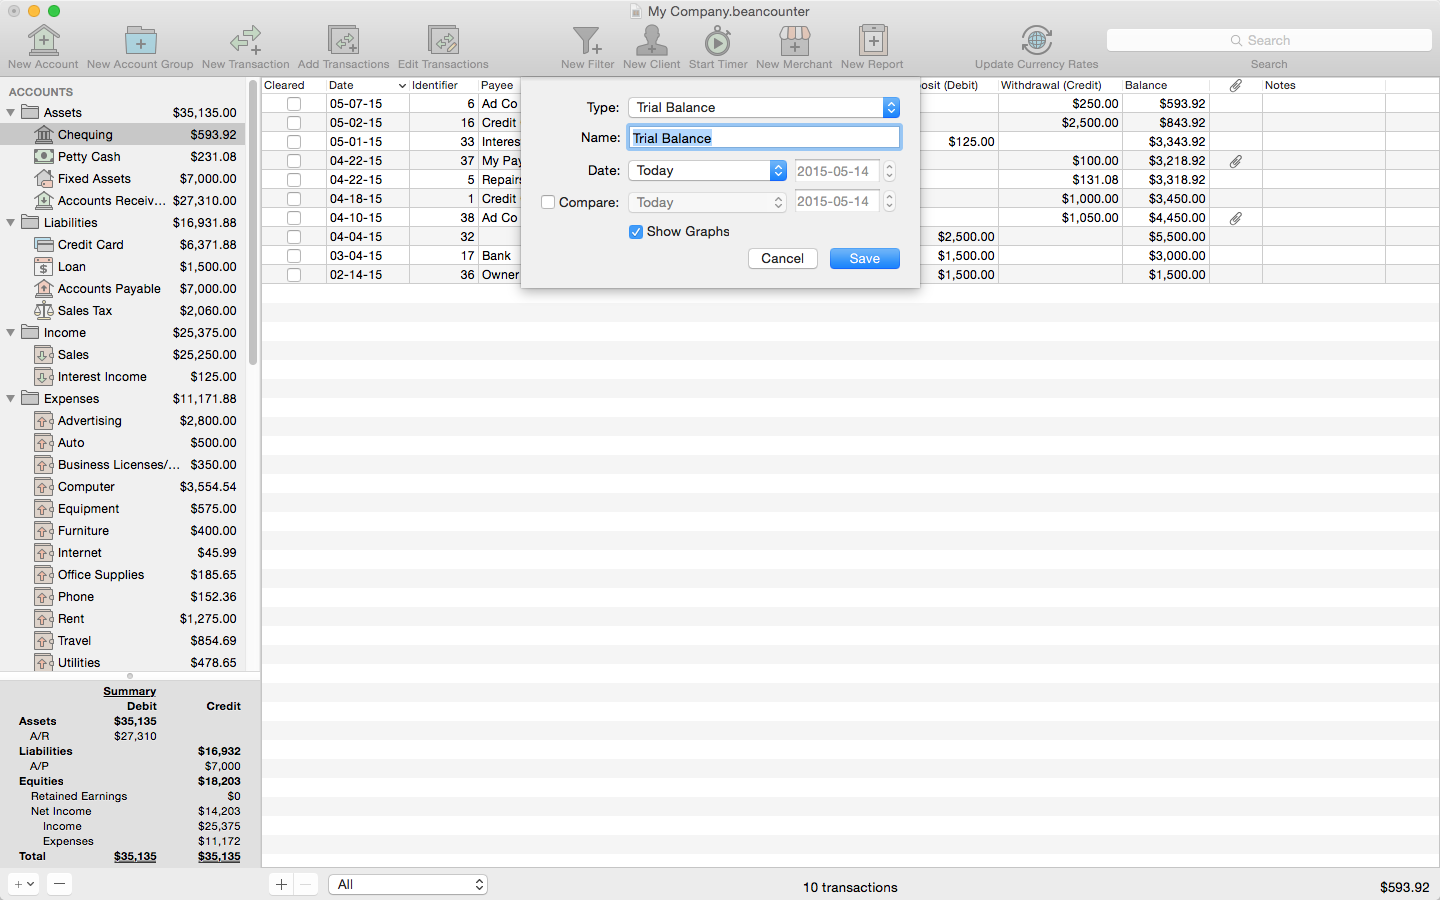
Date field may be updated by selecting the month, day, and year text field or by clicking the small arrow next to it. This will display a calendar view. The Identifier field contains a number for the transaction that is unique to all accounts. The Payee and Description fields describe the transaction. The Account 1 and Account 2 fields are the two transaction accounts. The Repeat field allows a transaction to reoccur with a defined interval and optional end date. The Debit and 
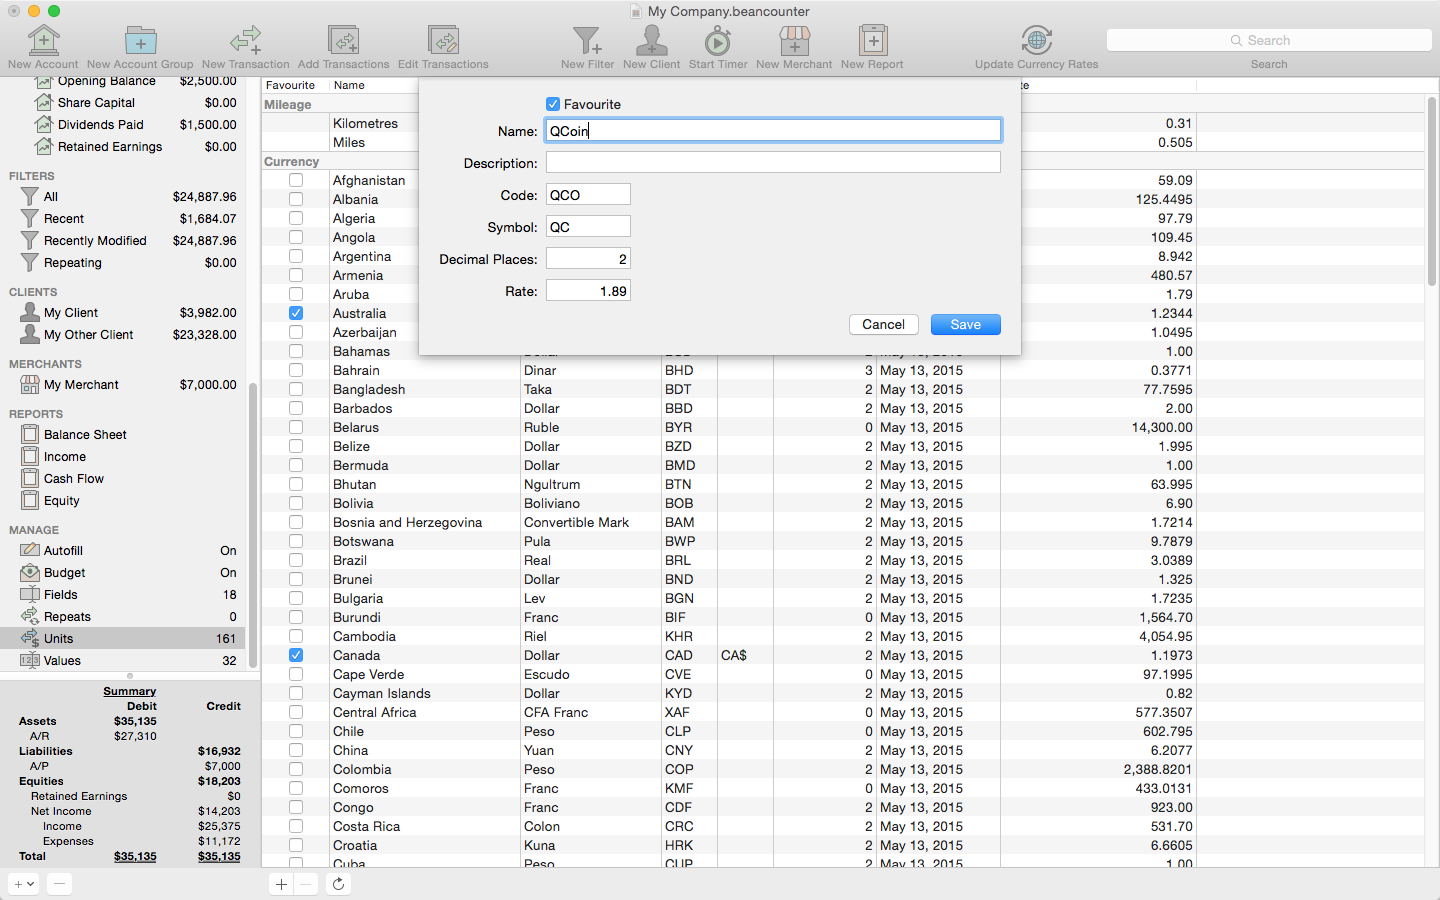
Credit fields specify the transaction total. Only one field may contain a value. Select the total unit (currency/mileage) from the popup on the right. The total values are automatically converted using the current exchange rates specified in the Units view (under Manage). A different total value may be entered, however. The effective exchange rate is displayed below each total. To enter mileage, select kilometres or miles for the unit (at the top of the list). The Notes field displays any notes for the transaction.

A transaction may be split to divide the total between more than two accounts. Add or delete split items for each account that contains part of the total. The transaction cannot be saved until the total all of items balance (debits = credits). If the items do not balance, the scale button next to the debit/credit fields is enabled. Click the button next to the split item that should be adjusted to balance the transaction.

The Attachment view displays any transaction attachment files. Attachments may be previewed by double-clicking the file icon or selecting it and pressing the space bar. To add a new attachment, click the + button and select Capture from Camera, Import from Camera/Scanner, Record Voice Memo, or Add File. New file attachments may also be dragged into the attachments window from the Finder. To reorder the attachment, drag and drop the file icon to a new position. To view an attachment, select it and press the space bar or double-click the item.

Filters
Filter Info

The filter info window is displayed when creating or editing a filter. Filters may contain any combination of fields and values. Set the filter name and click the + button to add a new filter criteria or the - button to delete one. To add a new criteria group, hold down the Option key and click the + button.

Transactions

Filters dynamically update the transaction list based on the specified field and value criteria.

Clients
Client Info

The client info window is displayed when creating or editing a client. The client details and logo may be set. Alternatively, click the Address Book button to select an existing contact to populate the client fields.

Projects / Estimates

Select a client to view the project/estimate list (at the top of the view). Projects and estimates are treated similarly except that estimates do not contain task items or invoice transactions. Projects (and estimates) contain date, completed, name, type, start date, end date, rate, unit, tax rate, total (uninvoiced), total (invoiced), owe, % paid, overdue, and notes fields. They can also optionally list the client field. The Completed field may be used to track when the project is finished. The Type field displays either project or estimate, the type cannot be changed once the project or estimate is created. The Start Date and End Date fields are optional and specify when the project starts and ends. The Rate field is used to enter the default bill rate for the project. This may be overridden for each task. The Unit field specifies the project currency while the Tax Rate is used for the default tax rate for the project (this may also be overridden for each task and expense). The Total (uninvoiced), Total (invoiced), Owe, % Paid, and Overdue fields are calculated based on the outstanding invoice transactions. The view may be configured to hide or rearrange fields. To convert an estimate to a project, select New Project from Estimate. This will copy the estimate's tasks and expenses to a new project.

Tasks / Task Items

Tasks may be timed or non-timed items of a project. Tasks contain date, completed, name, type, estimate, quantity, rate, subtotal, tax rate, total, and notes fields. They can also optionally list the client and project fields. The Completed field can be used to mark a task as done. The Estimate field allows a time value to be entered for the expected task completion time. The Quantity field is calculated from the task items if the task is timed. Otherwise, if the task is non-timed, the quantity is entered. The Rate field specifies the task rate (in the project's currency). The Subtotal field is calculated from the quantity and rate fields. The Tax Rate field specifies the task tax rate to use. The Total field is calculated using the subtotal and tax rate fields. The view may be configured to hide or rearrange fields. These settings are used for all tasks.

Task items represent a single contiguous time period for a timed task. Task items contain start, end, duration, and notes fields. They can also optionally contain fields for client, project, and task. The Start and End fields specify the start and end date and time for the task item. The Duration field is calculated based on the start and end fields. The view may be configured to hide or rearrange fields. These settings are used for all task items.

Task items may be entered manually or created using the task timer. The task timer can be started and stopped from the window's toolbar or using the menulet. The task timer menulet only appears when BeanCounter is running. To use the menulet, select a client, project, and task, and then select Start Timer. The active timed task and task item will appear in yellow. Note that only one task may be timed at once. Also, the menulet only displays tasks from the front most business document in the app.

Expenses

Expenses are purchases made for a client's project. Expenses contain date, name, quantity, cost, subtotal, tax rate, total, and notes fields. They can also optionally display client and project fields. The Quantity field specifies the number of expense items. The Cost field is the unit cost for the item (in the project's currency). The Subtotal field is calculated from the quantity and cost fields. The Tax Rate field specifies the expense tax rate. The Total field is calculated from the subtotal and tax rate fields. The view may be configured to hide or rearrange fields. These settings are used for all expenses.

Invoices

Invoices can be created for both projects and estimates. An invoice contains tasks and/or expenses (including partial quantities). Each invoice contains a set of related transactions to represent the initial outstanding balance and any later payments made by the client. The invoice contains date, number, name, sent, paid, due, repeat, tasks, expenses, total, owe, % paid, overdue, and notes fields. They can also optionally display client and project fields. The Sent and Paid fields can be used to track when the invoice was sent and paid off. The Due field can be optionally set to specify a due date for the invoice. If there's an outstanding balance after the due date, the Overdue field displays the number of days the invoice is overdue. The Repeat field allows an invoice to reoccur with a defined interval and optional end date. The Tasks and Expenses fields display the task and expense totals for the invoice. When adding or editing an invoice, a table of project tasks and expenses is displayed. Select the checkbox to include a task or expense in the invoice. Double-click an item to change the quantity included in the invoice. The invoice Total, Owe, % Paid, and Overdue fields are calculated based on the invoice transactions. The view may be configured to hide or rearrange fields. These settings are used for all invoices.

Click the send invoice button (next to the +/- buttons below) to generate a PDF of the invoice. The left panel displays the options and fields available for customizing the invoice. Enable or disable fields and add custom titles or values. The business contact fields, header, footer, and terms are retrieved from the business info view. The client name and contact fields are taken from the client info view. The Layout popup at the bottom of the view changes where items are placed and the page design. Five standard invoice layouts are included and custom layouts may be added in Preferences. The right view displays a live preview of the invoice. The invoice may be emailed, printed, or saved. The invoice settings are saved independently for each client.

Each invoice contains a set of related transactions. Generally the first transaction includes the invoice total. It always includes a debit to an accounts receivable account. Any changes made to the invoice tasks and expenses list will update this transaction. If taxes are included for any tasks or expenses, the transaction will be split to a tax account. Select an invoice and add a new transaction to record a payment. To make a payment to multiple invoices, add a new transaction while selecting the invoices.

Merchants
Merchant Info

The merchant info window is displayed when creating or editing a merchant. The merchant details and logo may be set. Alternatively, click the Address Book button to select an existing contact to populate the merchant fields.

Bills

Select a merchant to see the list of bills. Each bill contains a set of related transactions that represent the initial balance and any later payments by the business to the merchant. The bill contains date, name, received, paid, due, repeat, total, owe, % paid, overdue, and notes fields. They can also optionally display the merchant field. The Received and Paid fields may be used to track when the bill is received and paid. The Due field can be optionally set to specify a due date for the bill. If there's an outstanding balance after the due gate, the Overdue field displays the number of days the bill is overdue. The Repeat field allows a bill to reoccur with a defined interval and optional end date.The Total, Owe, % Paid, and Overdue fields are calculated based on the related bill transactions. The view may be configured to hide or rearrange fields. These settings are used for all bills.

Each bill contains a set of related transactions. Generally the first transaction is the bill total. It always includes a credit to an accounts payable account. Select a bill and add a new transaction to record a payment. To make payments to multiple bills, add a new transaction while selecting the bills.

Reports
Report Info

The report info window is displayed when creating or editing a report. The report type, name, and date or interval may be set. A comparison report may also be included. Select the Show Graphs checkbox to include relevant graphs for the report. Note that the report type may not be changed after the report is created.

Reports

BeanCounter includes 10 types of reports including balance sheet, income, cash flow, equity, trial balance, custom currency fields, clients, clients (uninvoiced), merchants, and time. The contents of each report is automatically updated when it is selected. Reports may be emailed, printed, or saved.

The Balance Sheet report displays a balance sheet for the business as of the selected date. It may also optionally include graphs that display the assets, liabilities, and equities over time and a breakdown of the assets, liabilities, and equities by account. The Equities section of the report includes Net Income which is calculated based on nominal (income/expense) transactions for the current accounting period for the selected report date. The Retained Earnings (or Owner's Equity) is also displayed if a previous accounting period is defined (and the total value is non-zero). Note that this account name may be customized under the business info view. Select the Accounting tab and select either a Nominal Transfer Account or enter a Retained Earnings Name (if None is selected for the Nominal Transfer Account).

The Income report displays an income statement for the business for the selected date interval. The statement includes the calculated Net Income for the date interval. The report may also optionally include graphs that display the income, expenses, and net income over time and the breakdown of income and expenses by account.

The Cash Flow report displays a cash flow statement for the business for the selected date interval. BeanCounter uses the indirect method for preparing the cash flow report. The report may also optionally include a graph that displays the cash flow over time.

The Equity report displays the equity statement for the business for the selected date interval. The report may also optionally include a graph that displays the equity total over time.

The Trial Balance report displays a trial balance for the business as of the selected date. The report may also optionally include graphs that display debit and credit totals for each account.

The Custom Currency Fields report displays a list of custom currency fields with totals by account. The report may also optionally include graphs that display the field and account totals.

The Clients report displays a list of clients and projects with totals for the selected date interval. The total represents the total invoice amount for the client/project during the date interval. The report may also optionally include graphs that display the total invoice amount over time as well as the total by client.

The Clients (uninvoiced) report displays a list of clients and projects with uninvoiced totals for the selected date interval. The total represents the total uninvoiced amount for the client/project during the date interval. The report may also optionally include graphs that display the uninvoiced total amount over time as well as the total by client.

The Merchants report displays a list of merchants with totals for the selected date interval. The total represents the total bill amount for the merchant during the date interval. The report may also optionally include graphs that display the total bill amount over time as well as the total by merchant.

The Time report displays a list of clients and projects with the total task time for the selected date interval. Note that the total task time may include time that has not yet been invoiced. The report may also optionally include graphs that display the total task time over time as well as the total task time by client.

Manage
Autofill

The autofill view is used to configure the transaction autofill settings. If enabled, autofill populates transaction fields based on the last transaction with the same field value. Select which Trigger fields to use to invoke autofill. When a trigger field's value is set, the other fields are populated based on the last transaction with the same field value. The Autofill fields are the fields that are populated if a matching transaction is found.

Budget

The budget view lists each group and account budget. Enter a total, unit, and start date for each group/account that requires a budget. Budgets may optionally include a cycle. If a cycle is set, the budget amounts may be rolled over to the next budget period by enabling the rollover setting. The progress bar on the right side of the view displays the current total relative to the assigned budget total.

Fields

The fields item allows custom transaction fields to be created. Note that transaction fields may be reordered (simply drag the field row to a new location). The Standard fields may be renamed but may not be deleted (although they can be hidden in an account view). Nine types of custom fields may be created including checkbox, currency, date, list, number, percent, tags, list, and percent total. The Currency field type always uses the same unit as the transaction. List and Tag fields contain a list of user items that may be edited in the second column. List fields allow only one item to be selected while tag fields may have zero or more items selected. Select the accounts and views to display each field from the Views popup. Deleting a field will also delete all transaction data for that field.

Repeats

The repeats view displays a list of all repeating transactions, bills, and invoices. If a repeat is deleted, select to delete either both the repeat and all related items or just the repeat (leaving the repeat items untouched).

Units

The units view is used to set the currency exchange and mileage rates. These rates are used when initially adding a new total in another currency. The unit name, symbol, rate, and decimal places may be edited. Custom units may also be added. Note that the unit code must be unique and can't be changed once created. Exchange rates are relative to the business currency (set when the business was created). To update all currency exchange rates, click the Download Currency Exchange Rates button in the toolbar (or under the Manage menu). For mileage, select either Kilometres or Miles to set the amount per kilometre or mile in the business currency. To save a favourite currency, select the checkbox to the left of the currency. Favourite currencies appear at the top of the units popup menu. By default, Australia, Canada, Europe (Euro), Japan, Switzerland, and the United States are included as favourites. Note that setting or updating currency exchange rates (or mileage) does not impact conversions for existing transactions. These are updated only when a transaction total is changed. The other values are then automatically calculated using the new currency exchange or mileage rate. To update existing transaction totals to use the current rates, select the transaction and select Update Converted Totals from the Transaction menu.

Values

The values view displays a list of saved values for each field. These values are used when the autocomplete feature is enabled. When a transaction, client project, task, expense, invoice, or merchant bill is saved, any new textual values (including custom transaction text fields) are added to the list. Values may also be directly added, edited, or deleted from the values view. Click Reset Values to delete the current values from the list and repopulate the list based on current field values. Note that editing or deleting values does not affect existing item field values.

Import/Export
Import

BeanCounter supports importing transactions from CSV (comma separated value), QIF, and OFX/QFX files. Project tasks (including task items) and expenses may also be imported from CSV files. CSV files must contain a header line at the top followed by data lines.

If importing a CSV file, the import view is displayed. The table displays a list of source fields (from the CSV file) and target fields (from the business). Match the source field to the target field to direct data from the source column to the target field. BeanCounter will automatically attempt to match source and target fields. If the source field should not be imported, select Do Not Import.

If importing transactions, in addition to target transaction fields, the values may be split to an account. For example, the CSV file being imported may contain a column to specify tax. This value may be added as a split item to the transaction by selecting Split to Taxes.

Some target fields also have additional settings. Date fields include a setting for specifying the date format. The date format must follow conventions specified by the Unicode Technical Standard #35. Debit, Credit, Total, and split to account fields have a unit setting for specifying the field unit. If the unit is different from the business currency, the value will be converted using the currency exchange rates defined under units. The Attachments field includes a setting that defines the file path to the attachments folder. The import settings are saved with the business file. Account, list, and tag fields include a Create if needed checkbox to create the value if required. Once the target fields are selected, click Parse. This will read the CSV file and convert the data to transactions or tasks/expenses.

The following view displays a list of transactions or tasks/expenses that may be imported at the top and a list of existing items at the bottom. Each item to be imported (listed at the top) includes an Import checkbox. Select this field to import the item. BeanCounter will attempt to determine if the item already exists and deselect it if it does. Transaction identifiers are assigned by using the current sort order. Click Import to import the items into BeanCounter.

Export

Transactions may be exported as a CSV, HTML, PDF, QIF, or OFX file. Project tasks (including task items) and expenses may be exported as a CSV, HTML, or PDF file. Select a filter and/or date interval to restrict which items to include. Select the list of accounts (or projects) to include. Next select the fields to export. Note that the fields may be reordered by dragging a field to a new position. Finally, select whether or not to export transaction attachments. These are included in a separate folder and are linked from HTML exports. The export settings are saved with the business file.

Preferences

The preferences window displays BeanCounter settings that apply to all businesses.

General

The general preferences tab includes general application settings.

Select Open last business on launch to automatically open the last business when the application is launched. Note that this option is not available in the Mac App Store version of BeanCounter.

Select the Autocomplete text fields setting to show a list of possible values when typing in a text field. These values are listed in the Values view under the Manage tab.

Enable the Auto Save setting to automatically have BeanCounter save the document after the specified number of minutes has passed.

The Time Format setting is used for client tasks and invoices. It may be set to either minutes (5:30) or decimal (5.5) formats.

The Starting Identifier field specifies the minimum transaction identifier to use. Changing this value does not affect existing transactions, it only applies to new transactions.

The Default to last date/unit setting controls whether or not to use the last date/unit when creating a new transaction. If disabled, the current date and business unit are used.

The Idle timeout setting is used when the client/project task timer is active. This represents the number of minutes the computer must be idle (no user interaction) before showing an alert asking whether or not to count the time that has passed. This option may be disabled.

The Show task timer in menu bar setting shows or hides the task timer menulet in the system menu bar. If enabled, the menulet is displayed when BeanCounter is running. This makes it easy to track project time without requiring BeanCounter to be the front-most app.

If enabled, the Minimum task time setting specifies the minimum time (in minutes) that is recorded using the task timer. This may be used if the business requires a minimum time to be invoiced for a task. This setting does not apply to non-timed tasks or when manually setting a timed task start/end date/time.

The Round Invoice Task Time setting rounds timed tasks up to the specified value. This only applies when adding tasks to invoices.

The Sort Accounts, Sort Clients, and Sort Merchants settings specify how to sort accounts, clients, and merchants in reports. They may be sorted by their name, number (accounts), total, or as listed.

If selected, the Check for updates automatically setting will check for new application updates in the background every week. If an update is available, an alert is displayed which includes an option to learn more about the update. Click the Check For Update button to immediately check for application updates. Note that this option and button are not available in the Mac App Store version of BeanCounter. In that case, BeanCounter relies on the Mac App Store to provide update notification (and handle the installation).

Fonts

The fonts tab allows customization of report and export fonts. Select fonts to use for normal, bold, and italic text as well as small, normal, and large text sizes.

Colours

The colours tab shows colour settings for various elements within BeanCounter. Select the default colour to use for transactions, estimates, projects, tasks, task items, expenses, invoices, and bills. Colours may also be selected for various states including closed, locked, completed, cleared, paid, overdue, and owe.

Layouts

The layouts tab displays a list of installed invoice layouts (standard and custom). Layouts may be imported or exported, custom layouts may also be deleted.