 Contacts
The Contacts tab displays a list of contacts for a particular source and group.
Sources
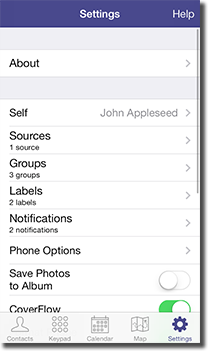
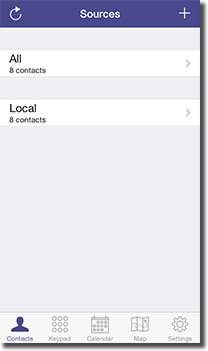
The top-level view displays a list of contact sources. These may include local, Exchange, LDAP, and CardDAV sources, for example. Tap the refresh button on the top left to reload the sources and their contacts. Tap the + button to add a new contact to the default source. Tap a source to view groups for that source. Note that the All source may contain Unified contacts which merges contact data from multiple sources into one contact (this is handled by iOS). The default source is specified using the Settings app under Mail, Contacts, Calendars (Default Account).
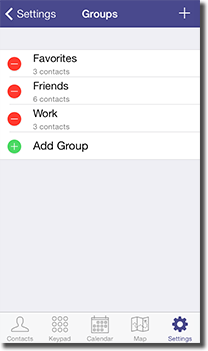
Groups
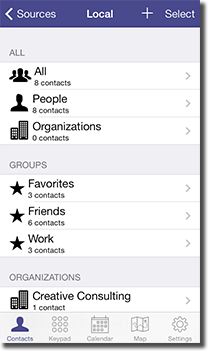
The groups list displays all groups and organizations for the source. Select All, People, or Organizations to list all contacts, only people, or only organizations and companies. A list of groups is located in the next section. If there are contacts without an assigned group, a group called No Group is listed at the end. Finally, the Organizations section lists all contact organizations. Tap the + button to add a new contact to the source. Tap the Select button to select one or more groups to email or text.
Contacts
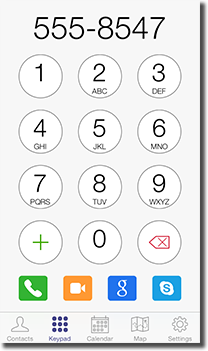
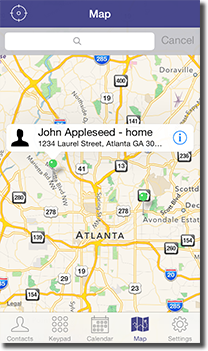
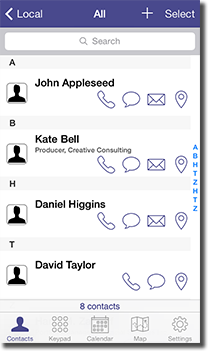
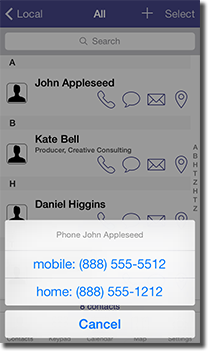
The contacts list shows contacts for the selected source and group. The contact name, title, and organization are displayed along with the photo (if available). Depending on the contact details, buttons to phone, text message, email, open a website, and locate an address on a map are located on the bottom right of the contact view. If more than one item is available (e.g. if there are three phone numbers for a contact), a sheet is displayed to select which item to open. If multiple phone options are available (for example, Apple Phone and Skype), a sheet will appear to select which app to use.
A search bar is located at the top of the view. Type in any contact detail (e.g. name, phone number, email address, part of a note, etc.) to filter contacts. The results are returned and grouped by the field that matches the search text.
Tap a contact to view and edit the contact details or tap the + button to add a new contact. Tap the Select button to mass select contacts to delete, email or text, add or remove from a group, or merge.
The contacts are sorted and displayed according to global contact preferences. To change these settings, launch the Settings app and tap the Mail, Contacts, Calendars item. Next, scroll to the Contacts section and update the sort and display order.
CoverFlow
To view contacts in CoverFlow mode, rotate the device to its side. Each contact will now display as an interactive business card with their name, nickname, title, organization, and photo (if available). Phone, text message, email, surf, and locate address buttons are displayed depending on the contact. A list of groups is displayed on the bottom left corner if the contact is a member of a group. The right side shows a flip arrow icon if the contact contains a note. Tap the button to flip the card and view the note. Swipe to the left or right to scroll through the contacts. An index bar is located below the cards. Tap a letter to jump to that position in the stack of cards. The CoverFlow mode may be disabled under the Settings tab.
Details
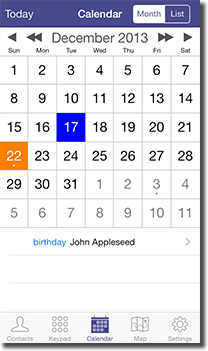
The details view shows all contact information available. It also allows you to edit and share the contact. Tap a phone number to phone or text message, email address to email, url to open the website, or address to locate the contact in the Maps app. If the contact birthday is set, the age will appear in the birthday field. A contact may be linked to other contacts if the same contact exists in multiple sources. If viewing the All source and the contact is linked, a linked section will appear at the bottom of the contact view with a list of linked contacts. Tap a linked contact to make changes or edit the unified contact to apply the changes to all linked contacts. If the contact is not linked, the bottom of the view shows the last modified and creation dates for the contact.
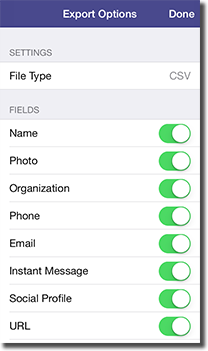
To share the contact, tap the Share button on the top right of the view. Select Email, iTunes File Sharing, or WiFi to send a vCard file. For iTunes File Sharing, open iTunes and select the device. Next select the Apps tab and then select ContactBook from the apps listed below File Sharing. Drag the vCard file to your desktop or select the file and click Save To... to specify the destination on your computer. Once the file has been copied, delete it from your device by selecting it and then pressing the Delete key. ContactBook does not delete the generated file. For WiFi, both the device and computer must be connected to the same WiFi network. To connect, enter the displayed URL in a browser on your computer and download the vCard file.
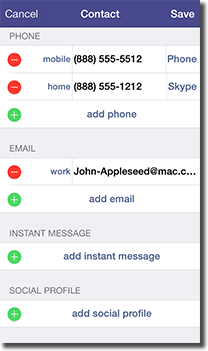
Tap the Edit button to edit the contact details. Add, delete, or replace the photo by tapping the add photo button or the photo itself. Tap Person if the contact is a person or Organization for an organization/company. Select groups to add or remove the contact to that group. Note that certain synced sources (e.g. Exchange) do not support groups. Phone, email, instant message, social profile, URL, address, date, and related fields all have a label to the left of the value. Tap the label to change it or add a new label by selecting custom... from the list. The right side of each phone number field specifies which app to use when calling. Select Ask for a sheet to appear if multiple phone options are available. Note that linked contacts do not support this feature. The instant message and social profile fields display the service to the right of the value. Tap the Delete Contact button at the bottom to delete the contact.